
Table of Contents
Blog.Fastssh.com – SSH is a system that allows its users to be able to control a device remotely, or it is often called a remote server. This article will explain step by step How to Use SSH SSL (STunnel) Account on Android and PC.
SSH (Secure Shell) or FTP (File Transfer Protocol), both of which are network protocols that run over the TCP / IP Layer. However, what we want to discuss at this time is SSH. Maybe there are still many who don’t understand or don’t know what SSH is at all, for this, let’s discuss what SSH is, what are the benefits and advantages of using SSH.
If using SSH, you have the option to authenticate the remote user before connecting. In addition, SSH can also send input from the SSH client to the host (server) and then send the results back to the user client.
SSH and SSL have differences, but the functions of both are almost the same. Both are public key cryptographic tunneling protocols that aim to create a secure and confidential exchange of information on data and the Internet, particularly the Internet. The encryption technology used by both protocols is very reliable and difficult or impossible for hackers to access.
How to Use SSH SSL (STunnel) Account on Android and PC
Before proceeding to the tutorial, you must first create an SSL account. To create a free SSL account you can visit the Fastssh.com site.
Create Free SSL (Stunnel) Account
Open the FastSSH site then select the STUNNEL menu to create an SSL account for free.


You can choose the country you want to use. Remember to see the Acc Remaining status. If it is still “green” it means the slot is still there and you can make it.
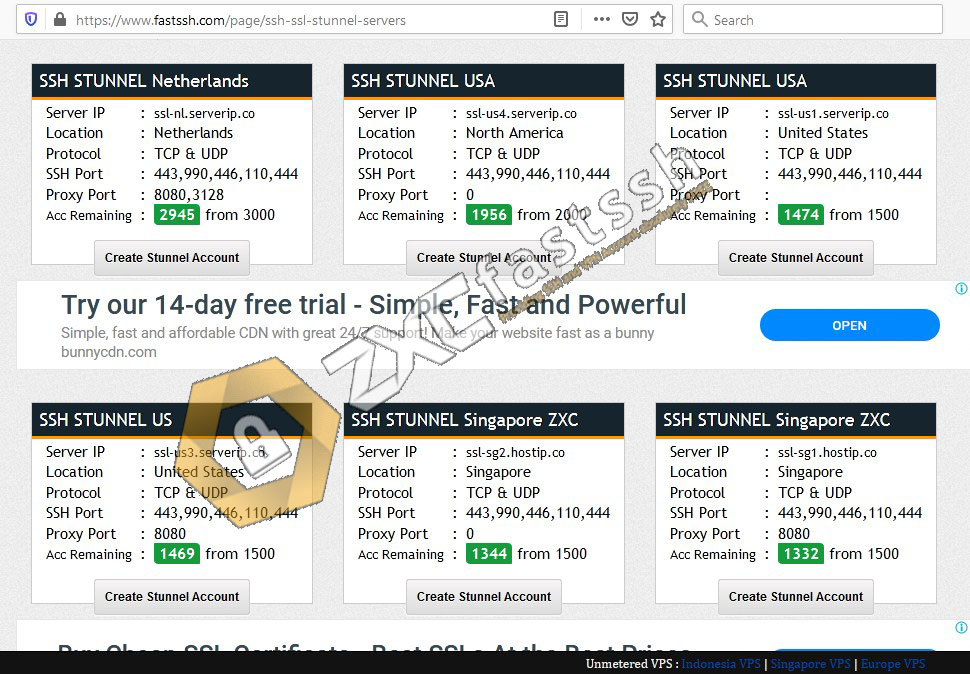

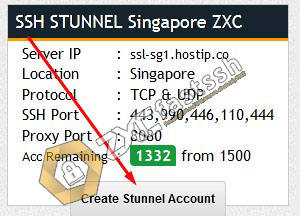
As an example I will create an SSH STUNNEL account with the Singapore ZXC server. Click the create account button.

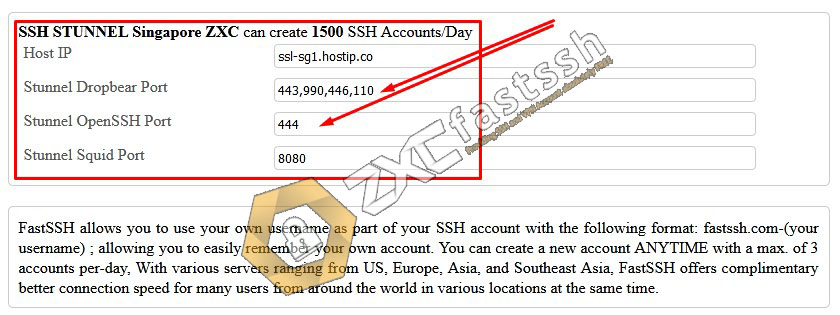
Please pay attention to the SSL / STUNNEL port used. This port will later be used in the Bitvise SSH Client application or Android applications such as HTTP Injector or KPNTunnel.

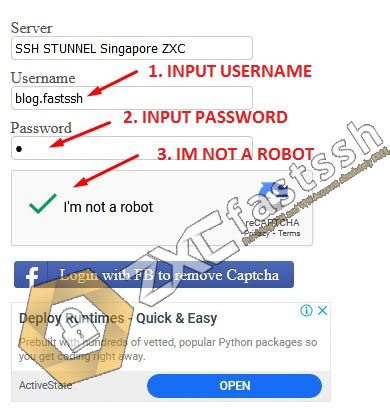
Fill in the SSL / STUNNEL Username and Password to your liking. (can be filled with anything).


Wait for the account creation process for a few seconds your account will appear successfully. There will also be a notification of the active period of your SSL account.
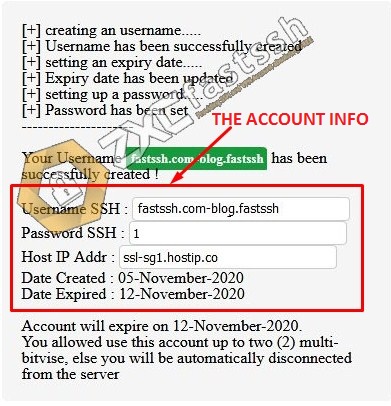

SSL / STUNNEL account has been successfully created.
How to Use SSL (Stunnel) Account on Android
To use SSL on Android, there are several ways you can do, one of which is to use the HTTP Injector application. Download the HTTP Injector application on the Play Store or via the link below:
- https://play.google.com/store/apps/details?id=com.evozi.injector
For the purposes of free internet tricks, you must use the Config HTTP Injector. This config is the key to the free internet that you will use. For example here we are using config which is still active in our country or place.
Download Config HTTP Injector via the link below:
Next, you have to import the HTTP Injector Config that you downloaded above in a way like the tutorial below:
Import Config HTTP Injector:
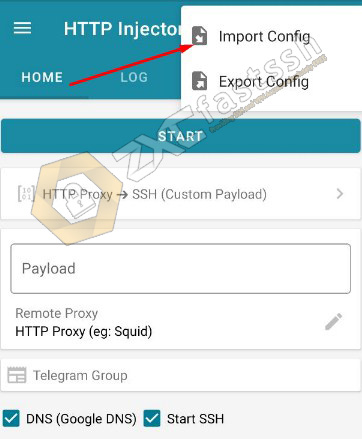
Open the HTTP Injector application then Follow the arrows in the image below for step by step Import Config.
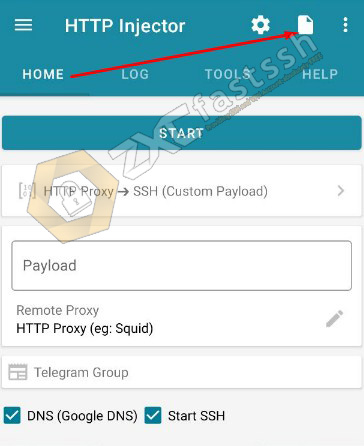

Tap Import Config.

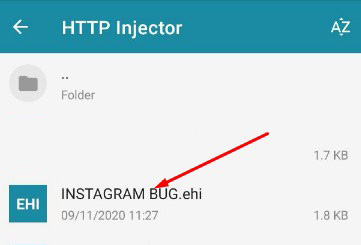
Find where you saved the config file that you downloaded above.
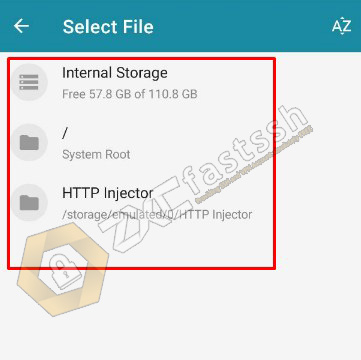

Tap on the config to import, the config file is in .ehi format.

Config successfully imported correctly.
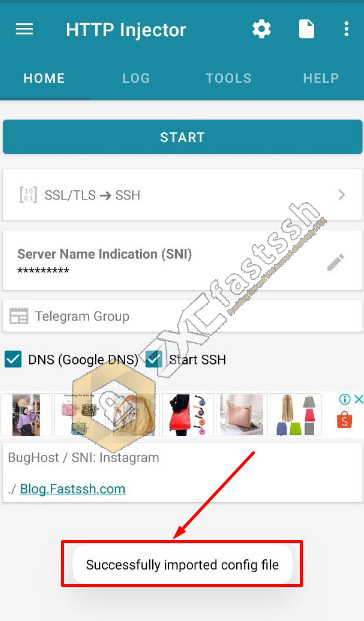

The tutorial on importing the HTTP Injector Config is complete. Now we set SSL in HTTP Injector.
Input SSL (Stunnel) Account to HTTP Injector
Return to the HOME menu on the HTTP Injector and After you have successfully created the SSL account above, now enter the account in the HTTP Injector application. Follow the image below for the tutorial.
Tap (gear mark) located in the upper right corner of the HTTP Injector.
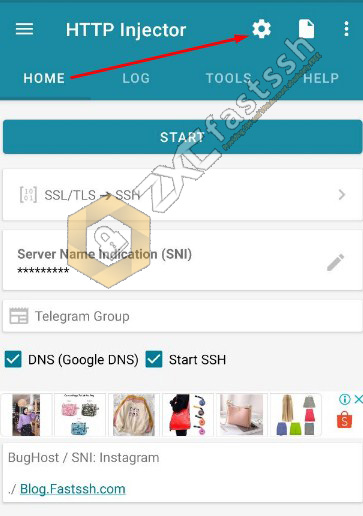

On the settings menu tap the Secure Shell (SSH) menu.


Enter the host, username, password and port of the ssh account that you created on fastssh.


Input SSL Account to HTTP Injector finish.
SSL (Stunnel) Connection on HTTP Injector
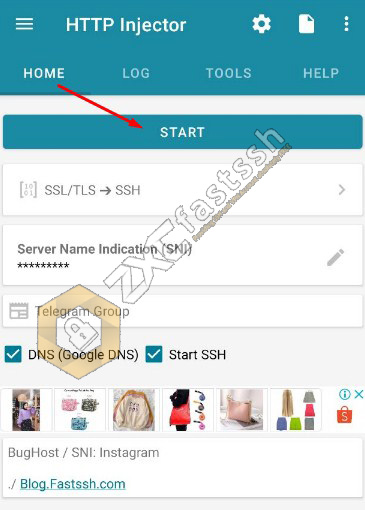
Return to the HOME menu on the HTTP Injector application then connect by TAP START.

Tap on the LOG menu on the HTTP Injector to see the status of whether your SSL is properly connected.
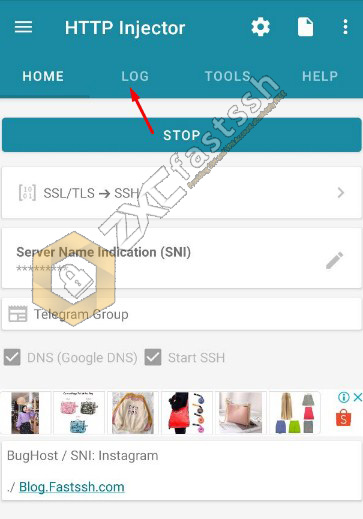

SSL has successfully connected properly. The sign is connected, there is a green VPN Connected status.
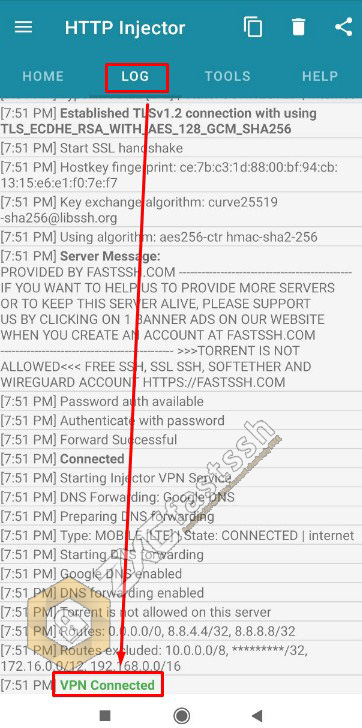

How to SSL Connection on HTTP Injector finish.
How to Use SSL (Stunnel) Account on PC
To use SSL on a PC you need the help of several applications. The first application that you must download is the Bitvise SSH Client.
Download and Install the Bitvise SSH Client Application via the link below:
- https://dl.bitvise.com/BvSshClient-Inst.exe
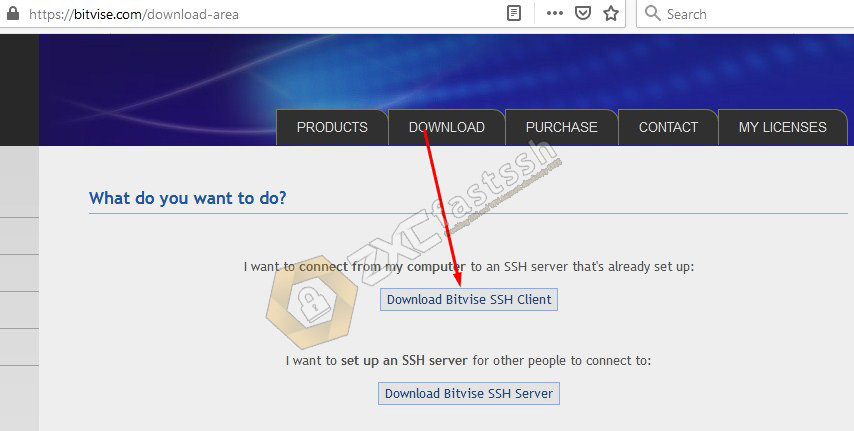

Download Inject SSL (Stunnel) For PC
For certain purposes, such as free internet tricks, you must use PC Inject so that your free internet tricks work properly.
This inject has various types. You can use the inject according to the free internet tricks that are still active in your area or country.
Setting Bitvise SSH Client
Open the Bitvise SSH Client application then enter the SSL Host, Username, Password and SSL Port that you created on the FastSSH site.
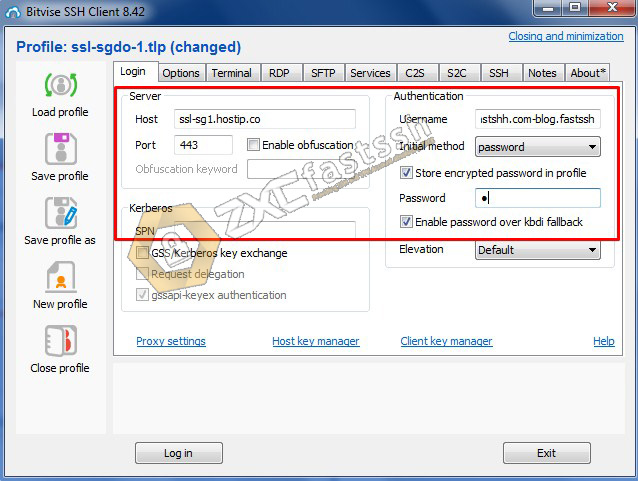

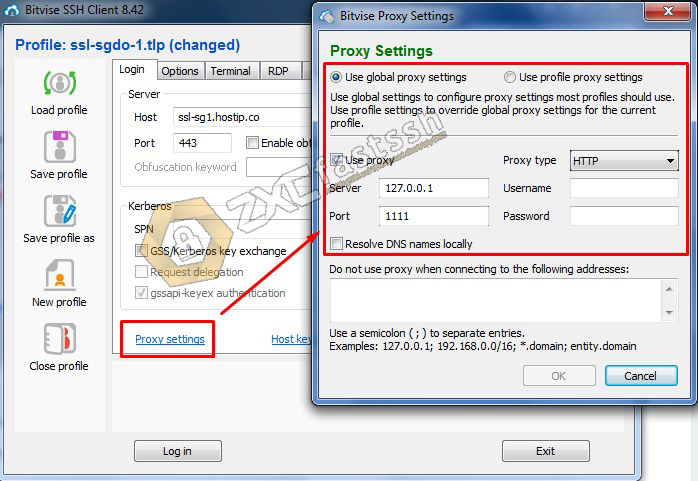
For the purposes of free internet tricks, you have to set “Proxy Settings” in the Bitvise application so that it can be connected to the Inject PC you are using.

Tap the settings menu options as shown: (this is so Bitvise can auto reconnect).
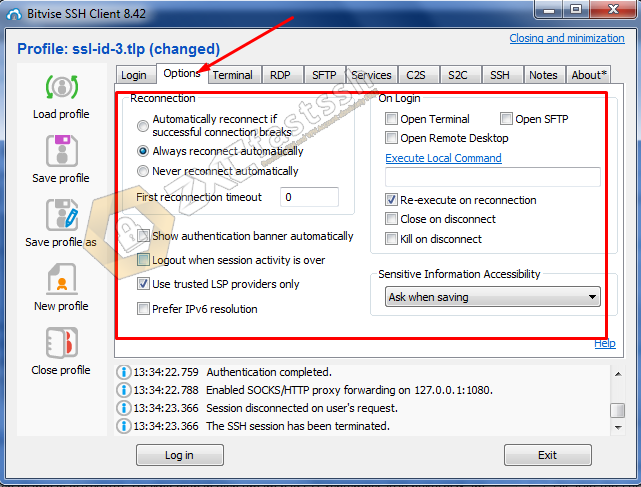

Tap again on the Services menu, check enable and fill in 127.0.0.1 port 1080.


Setting Bitvise Finished.
Download and Install the Proxifier Application
- https://bit.ly/34aBNhk
Don’t forget to enter the user and serial number of the Proxifier Application.
Setting Proxifier Application:
If the Proxifier application has been successfully installed on your computer, now you are setting the Proxifier application.
Point your cursor on the Profile menu then click Proxy Servers…


Klik Add.


Proxy Server Address is filled with 127.0.0.1 and Port 1080. Protocol select SOCKS Version 5 then OK.


Click the Proxification Rules Menu then select Add.


The Form Name is up to you, select browse where you saved the SSH Inject. Then on the Action Menu select “Direct” Then OK.
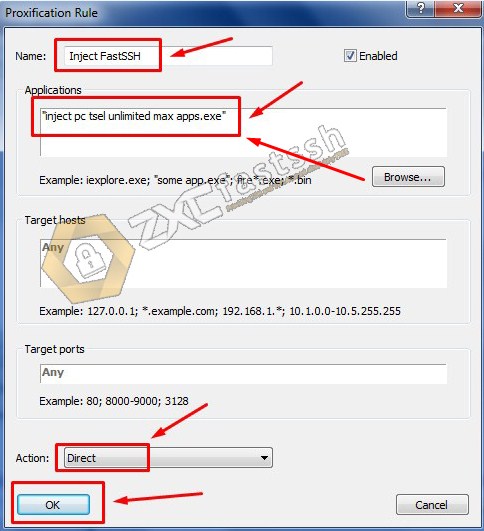

Results if the settings are correct.
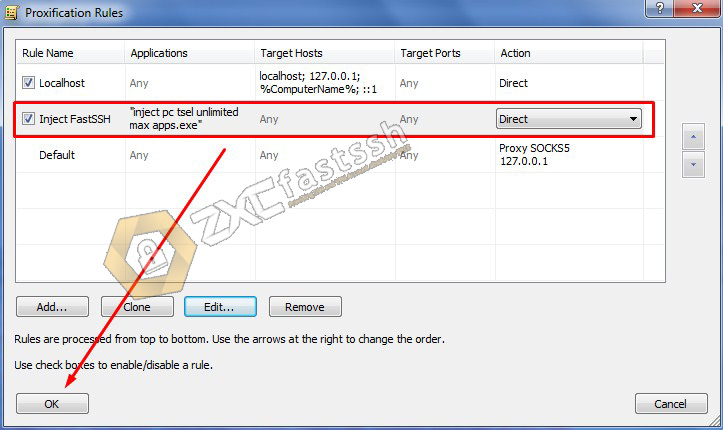

Setting Proxifier Finsih.
If you have trouble setting up the Proxifier application, you can also download the Proxifier file that we have set up and are ready for you to use.
Download the Proxifier that has been set in the link below:
- https://bit.ly/366113k
Connect SSL (Stunnel) and Inject PC
Of all the tutorials on how to connect SSL to a PC that have been described above, now we are entering the final stage.
- Connect the Modem on the PC, or Hotspot from Android to the PC (if your cellphone card is placed on the cellphone).
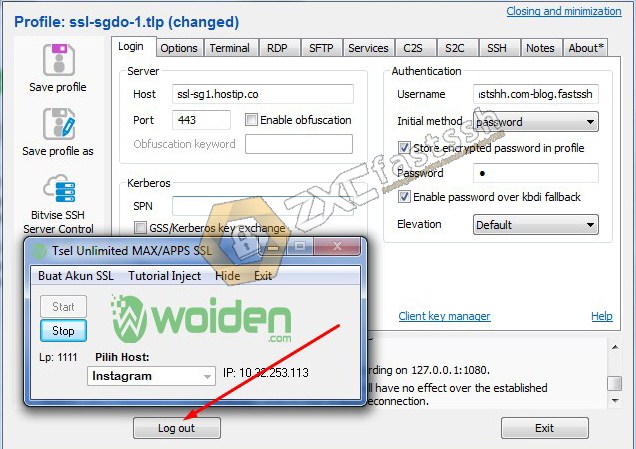
- Start Inject PC and Login Bitvise SSH Client.

- Open the Proxifier Application and Check.


- Done.
Conclusions For How to Use SSH SSL (STunnel) Account on Android and PC
By applying all the tutorials above correctly, you can use SSL (Stunnel) Free on Android and on PC. This trick aims to change your IP address and also for free internet tricks!
