Table of Contents
Blog.FastSSH.com — This article will explain to you How to Use CLASH on Windows. Please refer to this article until it’s finished and make sure nothing has been missed step by step.
Clash itself is an application that supports several protocols, almost the same as other inject applications such as Sagernet or Napsternet. But what distinguishes it is, in this application we are more free to use several options such as Load Balance, Best Ping, etc. But being free doesn’t mean we can easily use it.
How to Use CLASH on Windows
You can create a Trojan and Vmess account, for example, the admin will create a Trojan Server HE server on Howdy.id and a V2Ray Dynamic Server from FastSSH.
Create a Trojan and V2Ray account as usual, such as entering your username, password and SNI bug then copy the account you created earlier.
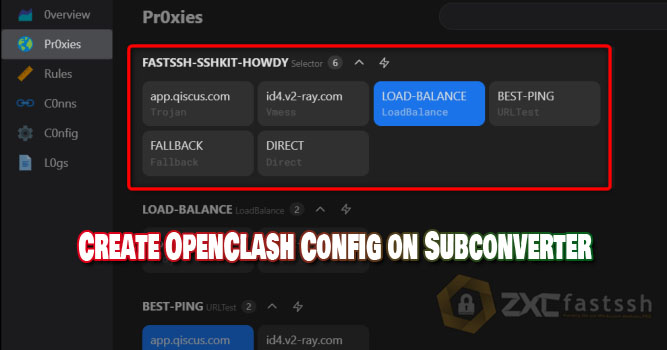
Next, visit the SSHKit.com site and select the Subconverter menu.

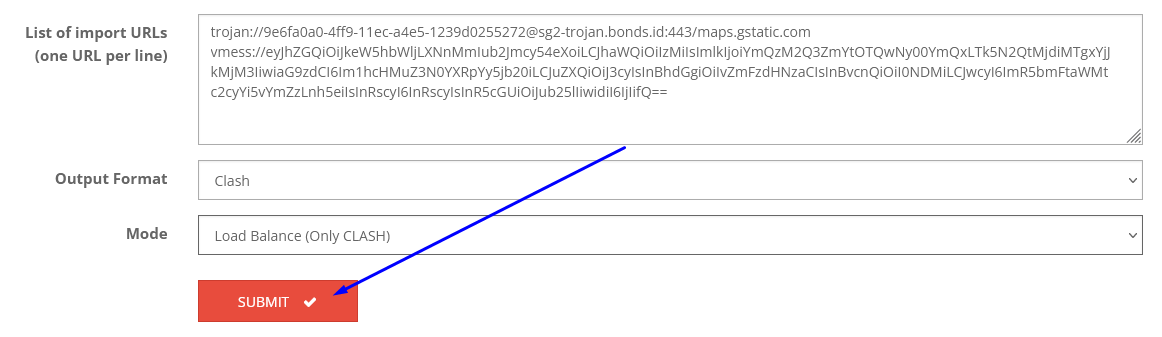
Paste some of the Trojan & V2ray accounts that you created earlier, giving a line spacing between one account and another.
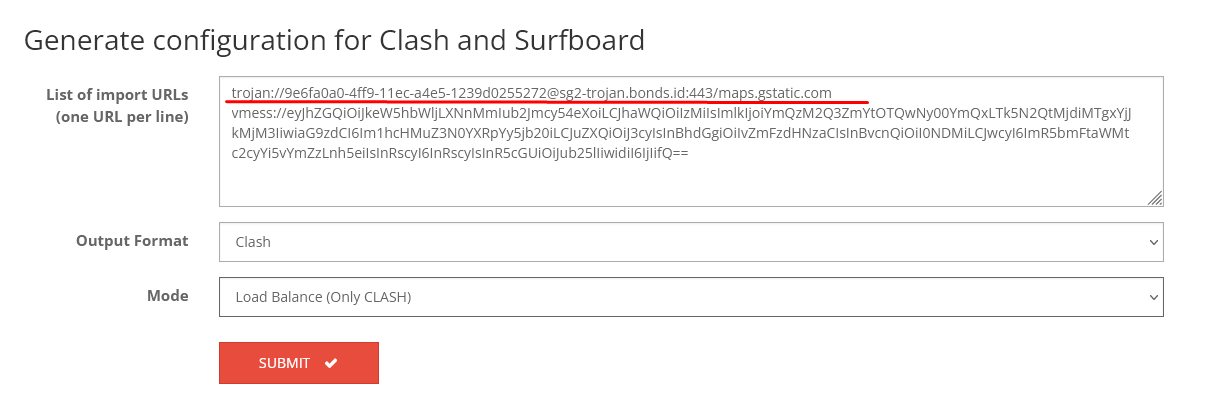
Select the Mode you want to use For the mode there are 3 modes, including:
- Manual : Select an account manually.
- Load Balance: Move accounts automatically if other accounts use too heavy.
- Best Ping : Selects the account with the smallest ping.
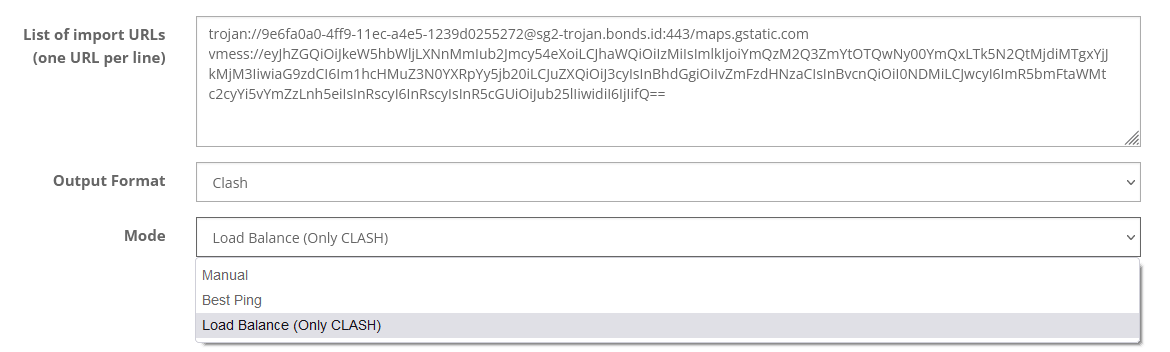
After selecting the Mode, click SUBMIT.
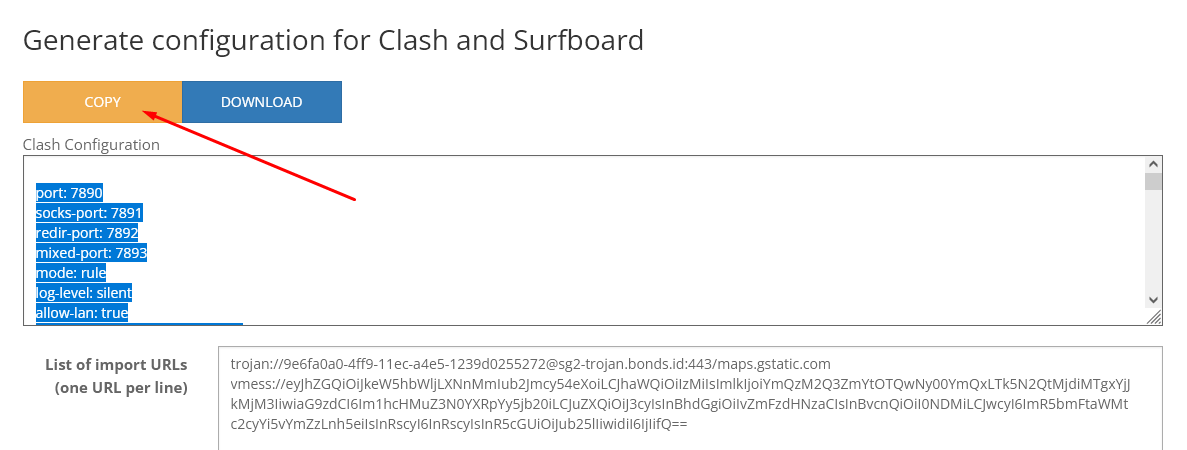
COPY or DOWNLOAD the clash account that you have created.
Download and Import Clash to Application CLASH .NET
Windows users themselves can use the Clash NET application. This application looks simpler than Clash For Windows and is easier to use.
If you experience an error when opening the Clash .Net application, first Download & Install Net Runtime 5 using the link below:
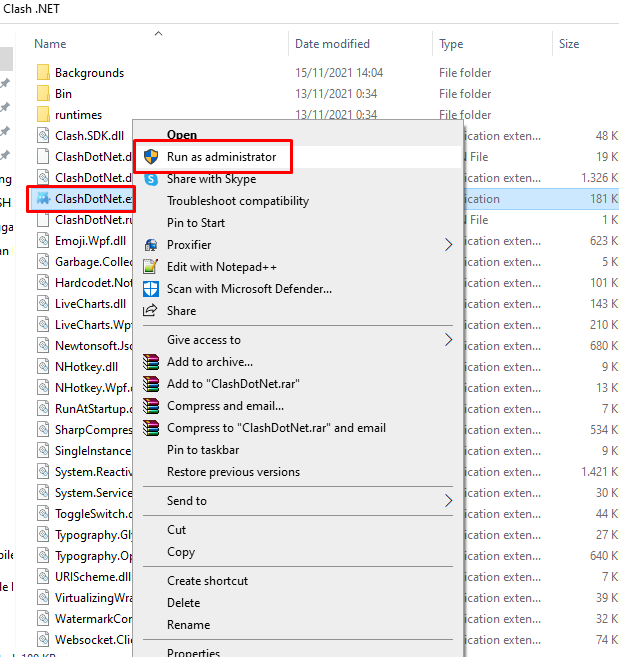
Open the Clash .NET application by running as admin.
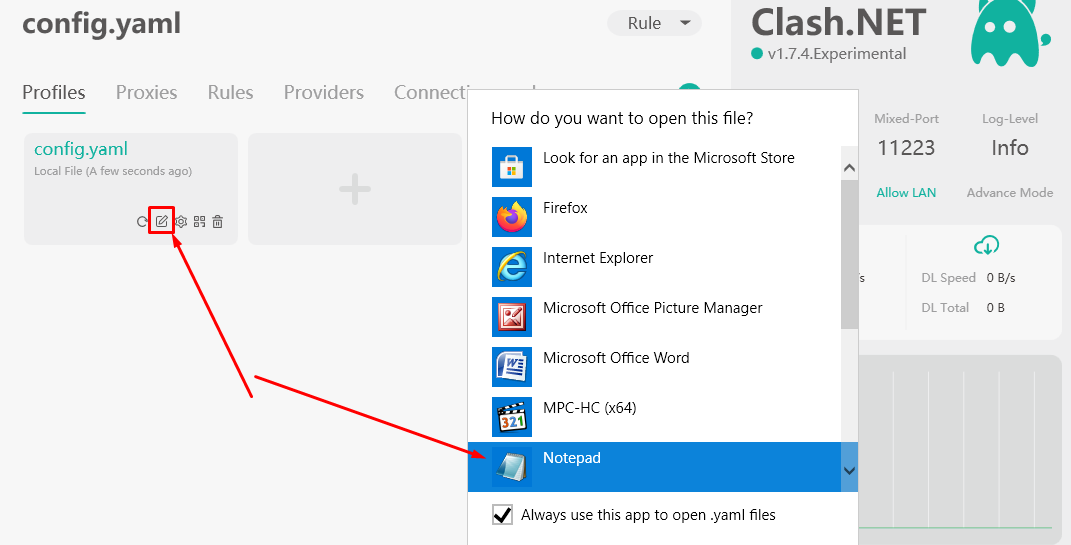
Then click the pencil mark, then open it with the notepad option as shown below.
Delete all the contents of the config.yaml earlier. Then paste the text from the clash account that you created earlier.

After you replace the contents of the notepad with the converted server from SSHkit earlier, now you save the notepad.
Close the Clash .NET application and then reopen it.
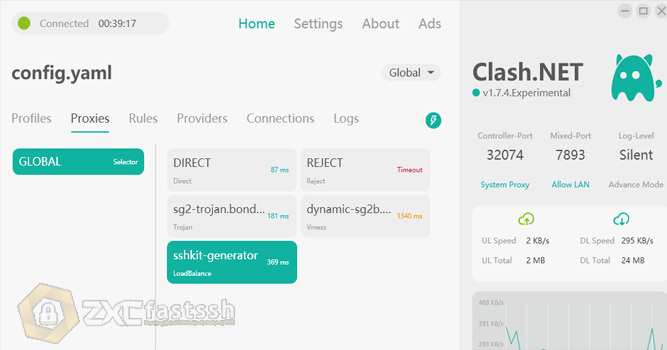
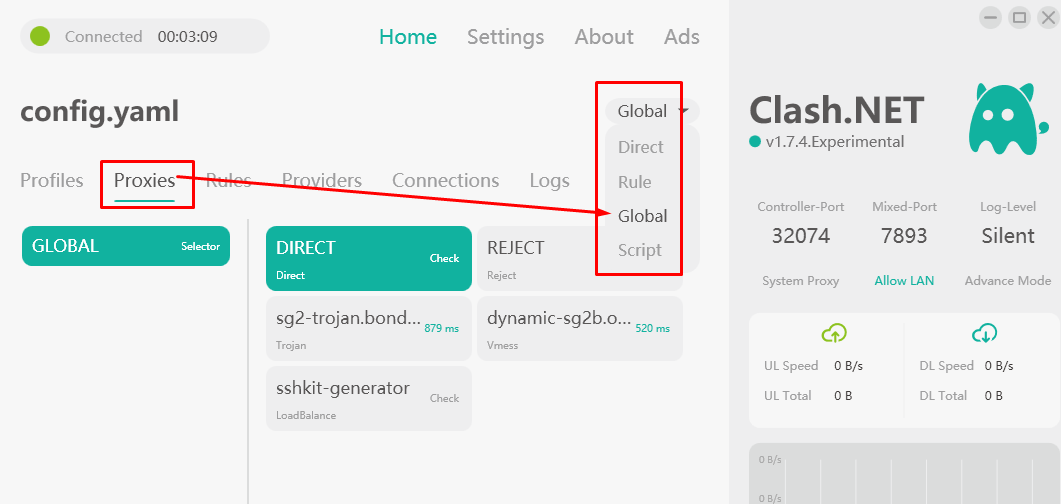
Once open, click the Proxies menu and then click Rule on the top menu and select Global.
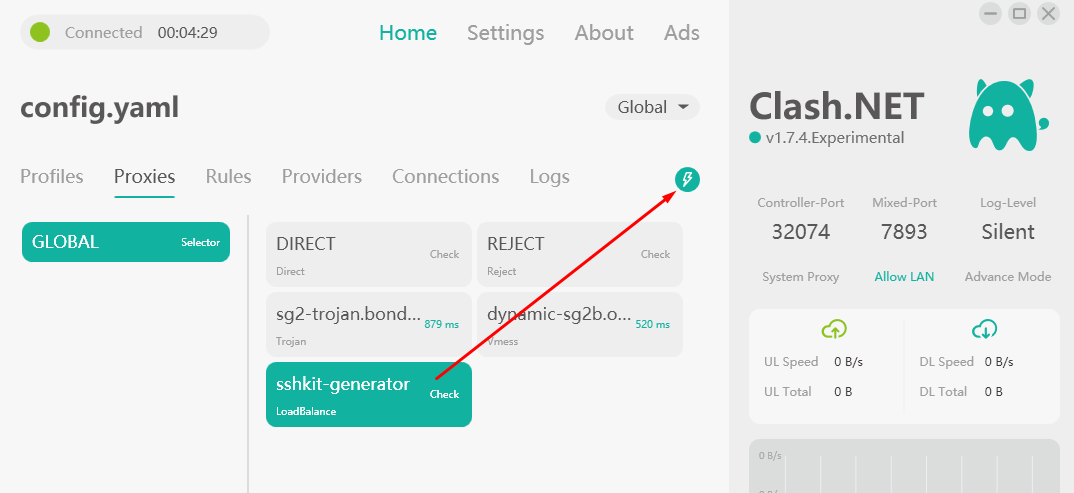
Then select the account you will use. If you can choose an account manually or use Loadbalance or Best Ping mode (according to the mode you chose when creating a clash account).
DO NOT choose DIRECT or REJECT
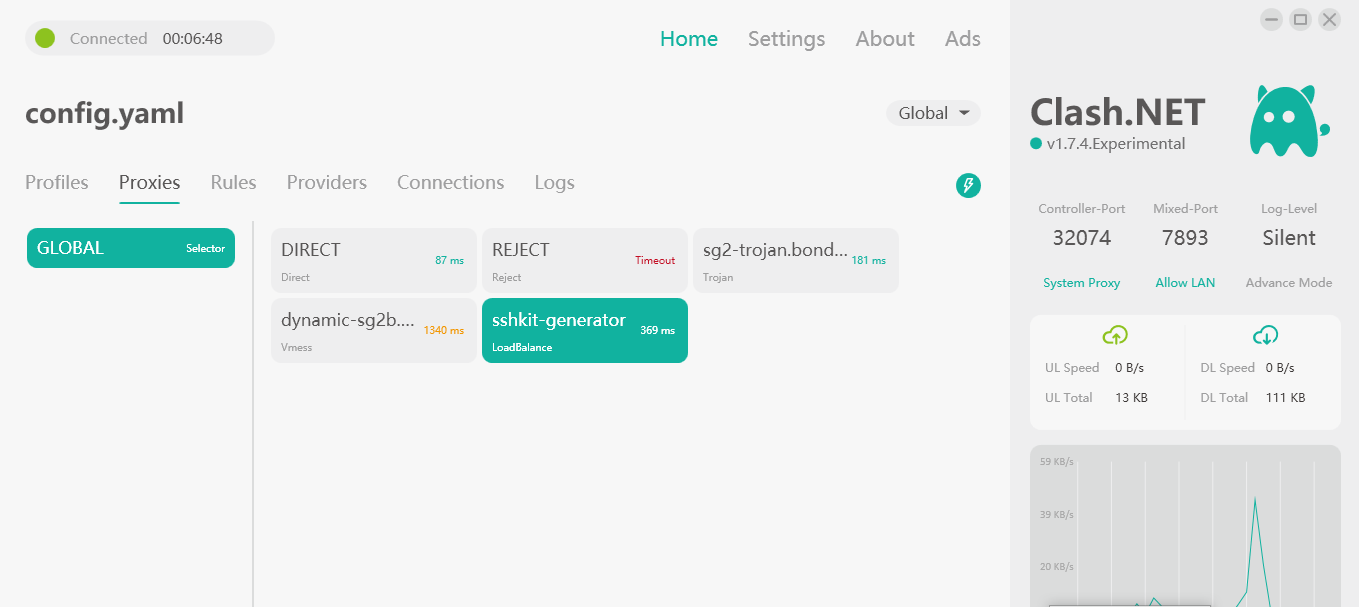
Finally, you can click the Lightning logo if you want to test the ping to see if the account can be connected.
Connecting Clash .NET is very simple, you just need to click on System Proxy on the right menu of the Clash .NET application.
Done.